

Der Festigkeitsnachweis bzw. die Durchbiegung von TRIAS WABIC Boards ist geprüft nach DIN 24537 – (Roste als Bodenbelag – Teil 3: Kunststoffroste) mit der Prüflast nach RAL-GZ 638 (Gütegemeinschaft Gitterroste e.V). Um die Festigkeit für das „Gesamtsystems Doppelboden“ zu gewährleisten dürfen nur Plattenbeläge mit entsprechendem Festigkeitsnachweis verwendet werden.
Laying patio slabs on grating – TRIAS WABIC
With the WABIC mesh flooring system from TRIAS, you can lay patio slabs freely on the mesh surface. The slabs are protected against falling through. The mesh elements can be easily assembled piece by piece. It is important to ensure the sub-base is well prepared. You can find a brief overview of the installation steps here.
Key points at a glance
What is TRIAS WABIC?
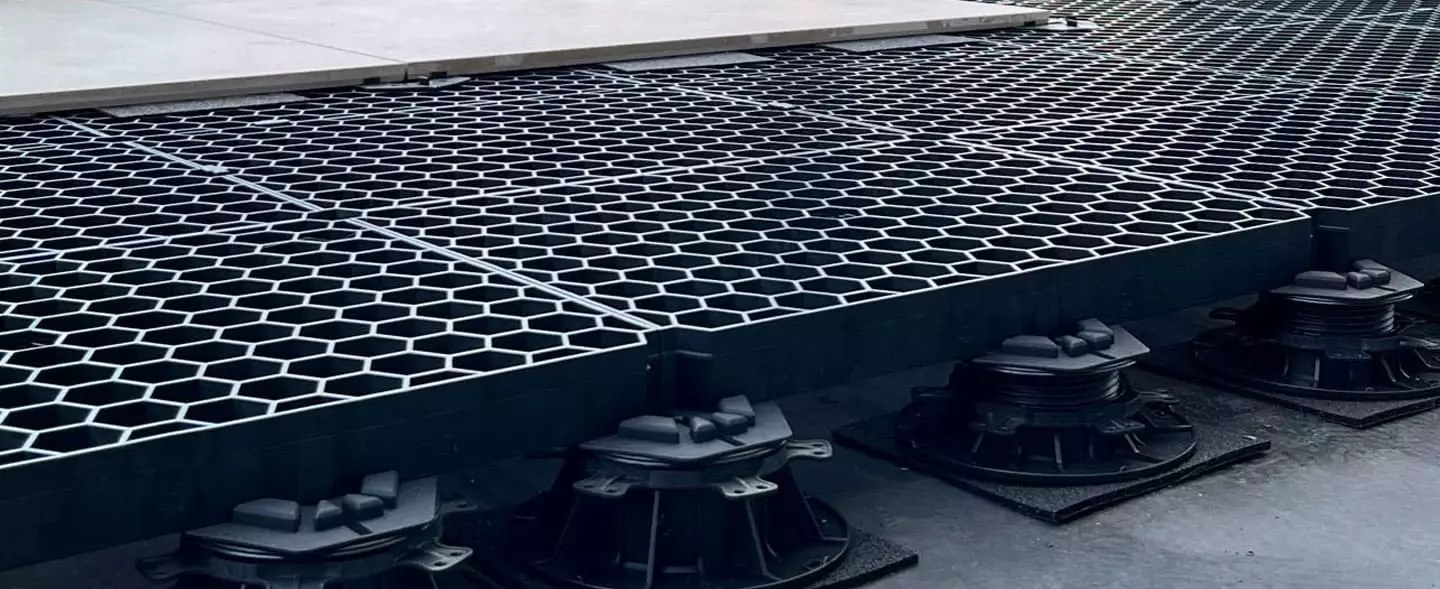
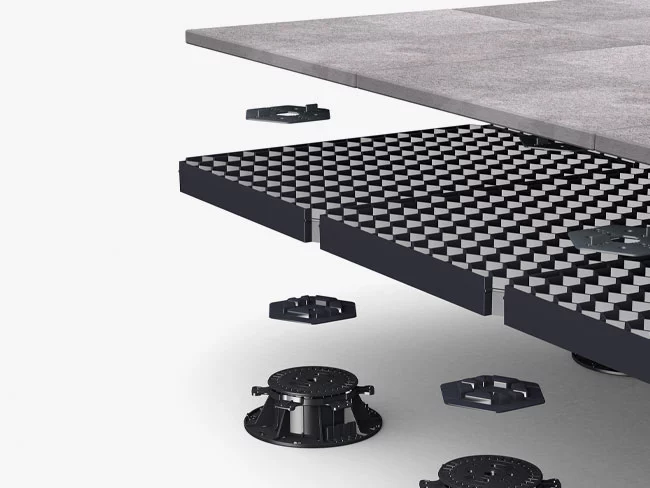
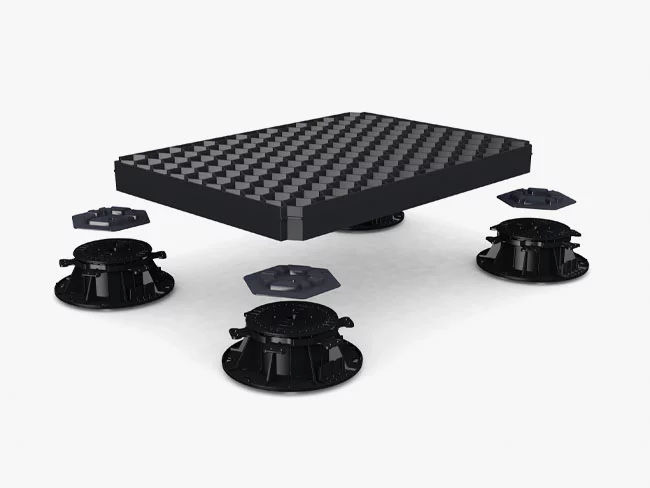
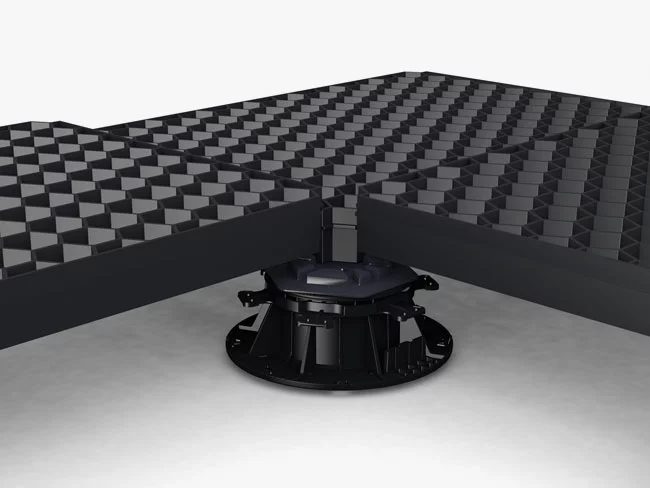
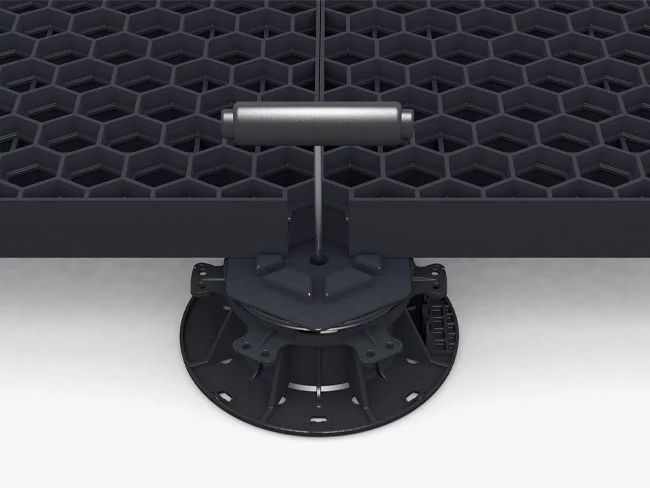
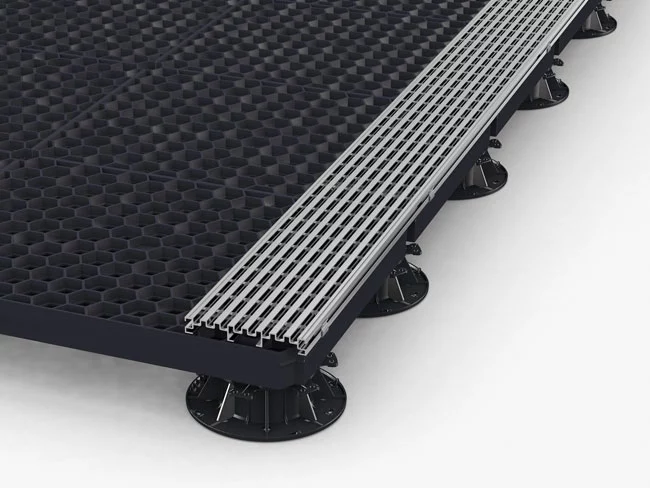
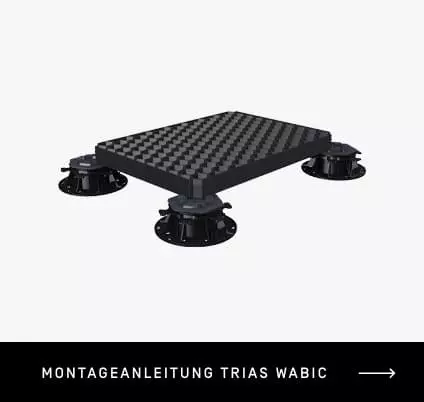
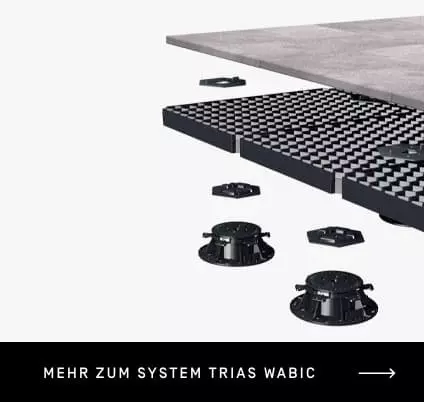
TRIAS WABIC is a substructure for terraces with slab paving. Decking boards cannot be installed on TRIAS WABIC. The core element of the system consists of grid boards made from sturdy hard plastic. The boards are mounted on pedestal supports. This creates a continuous grid surface to serve as the base for the decking slabs. Unlike with other systems, with TRIAS WABIC the decking slabs do not rest solely on the corners. They can be arranged freely across the grid surface. This simplifies planning and allows for a wider variety of laying patterns.
Advantages of TRIAS WABIC
Reasons to choose the TRIAS WABIC grid decking system:
- It protects slabs from breaking through.
- Slabs can be laid freely on the grid surface (many laying patterns are possible).
- Installation is slightly easier than fitting aluminium profiles.
- Differences in height/gradients can be easily adjusted using pedestal supports (unlike with ground-level installation).
- The flooring is ventilated from below (no waterlogging, unlike with ground-level installation).
- Secure hold on the grid surface (no slipping) and precise joint spacing
Configure
Before construction, we recommend designing your new decking using the TRIAS configurator. With the configurator, you can very quickly determine the required material quantities. IMPORTANT: Be sure to discuss your configuration with a specialist to ensure that nothing has been overlooked.
The best sub-base
In the garden, a gravel bed is the ideal sub-base. An old tiled floor on the balcony can also be used. Garages and new-build properties usually have a concrete surface available. Take care with insulated substrates. Be sure to read the technical notes in the installation instructions. Also check whether any permits are required.
Instructions: Laying patio slabs on TRIAS WABIC
Here is a quick guide to building a garden terrace using TRIAS WABIC:
Mark out the terrace area
To begin with, mark out the dimensions of the patio using posts and a taut builder’s line (or use marking spray). The gravel bed should be slightly larger; allow for approximately 20 cm on each side. You can plan the dimensions of the patio using the configurator.
Laying a gravel bed
To create the gravel bed, you will need to excavate the soil (to a depth of approx. 30–40 cm). Once the gravel has been compacted, you can lay down a weed barrier. Thoroughly compacting the gravel is very important for the stability of the patio.
Align the top edge and mark the slope
You can now use a builder’s line to set the required slope. First, stretch the line horizontally at the height of the future top edge of the paving. Then create the slope by adjusting the line slightly downwards at the post furthest from the house. The gradient is easy to calculate: at 2 per cent, the surface slopes down by two centimetres per metre; at 3 per cent, it slopes down by three centimetres per metre.
Lay out a test area
You should now lay out the boards to see whether the bottom row might need to be cut back too much. The boards you have cut must not be too small, otherwise there won’t be enough space at the edge for the adjustable feet. Never cut more than three-quarters of the board. Is the layout correct? If so, you can put the boards to one side again and move on to the next stage of assembly.
Fitting the first board
Start at a corner of the house. Place the first four TRIAS WABIC adjustable feet on the paving slabs. Adjust the adjustable feet to the desired height straight away. Tip: Where there are adjacent walls, move the adjustable feet slightly inwards or trim the base plate of the adjustable foot. For heavier loads, position additional adjustable feet in the centre. Ensure the required edge clearances from walls and structures are maintained (at least 2 cm as an expansion joint).
How to set up boards correctly
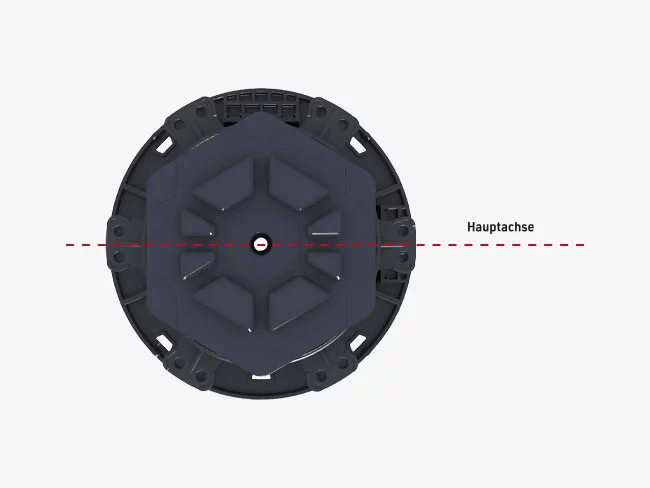
Place the add-on adaptors onto the pedestal supports until they click audibly into place. Now place the first TRIAS WABIC board onto the add-on adaptors. CAUTION: The long side of the boards must run parallel to the main axis of the adaptors. You can easily identify the main axis: it runs through the centre of the split (!) adapter heads. Two of the six adapter heads are split down the middle.
Build more boards
Fit further boards directly alongside one another. Avoid staggered rows. Lay them strictly in a cross-joint pattern, so to speak. Always fit the boards in the same longitudinal direction. Ensure that all boards click securely into the add-on adaptors. Check repeatedly that the entire surface is level and that the gradient is correct.
Readjust
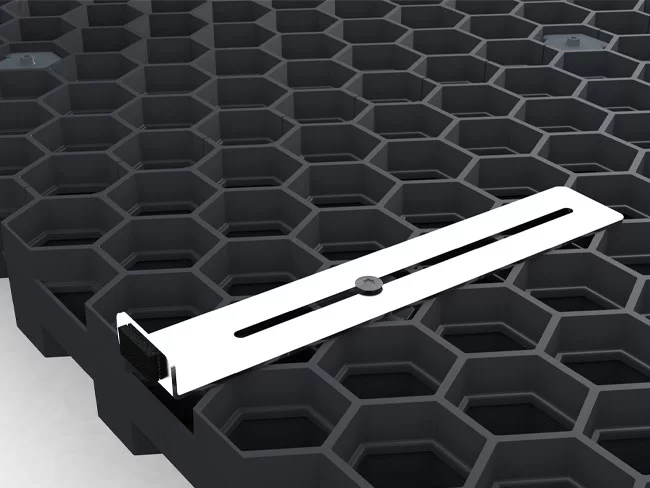
You can fine-tune the height of the adjustable feet using a socket spanner when the mesh boards are in place. The TRIAS WABIC boards should be unloaded whilst doing this. Another tip: you can use a screwdriver or folding rule to prevent the lower adjustment thread of the pedestal from turning.
Wie belastbar sind TRIAS WABIC Boards?


Wieviel Stellfüße brauche ich?
Die Anzahl der Stellzlager können sie im Online-Konfigurator ermitteln. Bei höherer Belastung ist es ratsam mehr Stellfüße einzusetzen. Die wichtigsten Aufbau-Schemas haben wir in der Montageanleitung zusammengefasst. Besprechen Sie Ihre Planung unbedingt mit einem Fachmann.
Kann man TRIAS WABIC Boards zuschneiden?
Ja, das ist möglich. An zugeschnittenen Längsseiten ist immer ein zusätzlicher Stellfuß in der Mitte erforderlich. Die Schnittline muss entlang einer Wabenkante verlaufen. Eine ausführliche Anleitung dazu finden Sie in der Montageanleitung.
Sollte man Randplatten mit Montagekleber befestigen?
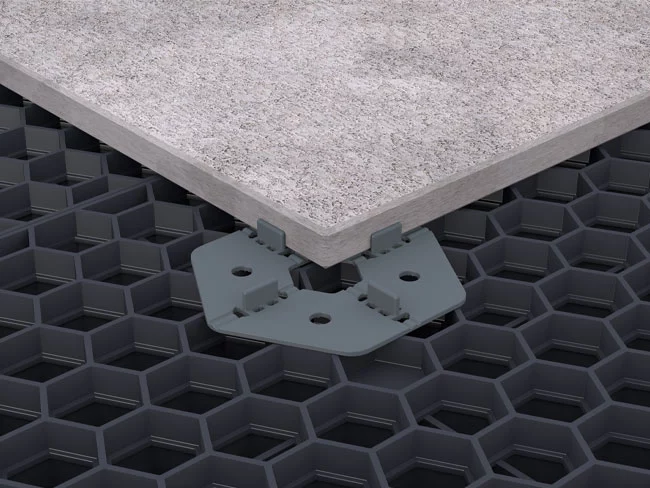
Ja, insbesondere schmale und kleine Platten sollten am Terrassenrand mit Montagekleber fixiert werden. Setzen Sie hierzu die TRIAS WABIC FIX-CLIP ein. Beachten Sie die Eignung des Klebers für die Material- Paarung Polyamid PA6 (FIX-CLIP) mit Ihrem Platten-Material. Ein geeigneter Kleber kann bei Ihrem Händler bezogen werden. Details finden Sie un der Montageanleitung. Eine Übersicht der Systemelemente finden sie hier.
Was muss ich bei großen Platten beachten?
Wir empfehlen mittig weitere X-Pads unterzulegen. Große Platten werden dadurch besser gestützt - der Trittschall vermindert. Nicht vergessen: Die Grate der mittig untergelegten Pads müssen gekürzt werden. Sie lassen sich einfach abschneiden.
Wieviel TRIAS WABIC Pads brauche ich?
In der Regel wird ein Pad je Eckstoß benötigt. Bei großen Platten verbessert man die Auflage, wenn mittig weitere Pads unter die Platte gelegt werden (Die Grate müssen entfernt werden). Wir empfehlen zusätzliche Pads:
- bei Plattenstärke 2 cm ab einer Platten-Kantenlänge von 50 cm
- bei Platten-Stärke kleiner 2 cm ab einer Platten-Kantenlänge von 20 cm
Kann man TRIAS WABIC Boards zuschneiden?
Ja, das ist problemlos möglich. Auch am Terrassenrand können Boards zugeschnitten werden. Die Randstücke dürfen nicht zu klein sein. Es muss immer ausreichend Platz für Stellfüße vorhanden sein. Offene Seitenränder (insbesondere Längsseiten) müssen unbedingt zusätzlich gestützt werden. Setzten Sie hierzu in der Mitte einer zugeschnittenen Längsseite ein weiteres Stelzlager ein.
Welche Platten sind geeignet?
Verwenden Sie nur frostsichere und für den Außenbereich geeignete Platten. Die Mindeststärke der Platten beträgt 20 mm (für Feinsteinzeug), bei dünneren Platten benötigen Sie für den Aufbau zusätzliche Stellfüße. WICHTIG: Die Angaben der Belaghersteller sind vorrangig zu beachten. Informieren Sie sich am besten bei Ihrem Fachhandel über die Produktstandards und Anwendungsempfehlungen.
Welchen Randabstand brauche ich an Hauswänden/Begrenzungsmauern?
Hier ist grundsätzlich ein Randabstand von ca. 2 cm vorzusehen. Er dient als als Dehnungsfuge und kann kleiner gewählt werden, wenn kein Dehnungsverhalten des Belags zu erwarten ist.
Wieviel Überhang brauche ich?
Der Überhang sollte maximal 25 mm betragen, damit noch eine seitliche Verblendung angebracht werden kann. Kleine und schmale Platten sollten am Rand geklebt werden. Das vermeidet kippelnde Platten beim Betreten des Terrassenrands.
Was muss beim Verlegen von Platten auf Dachterrassen/Untergründen aus Dämmstoff beachten?
Aufgrund der Vielfalt an Bauweisen von Terrassen, an Dämmstoffen und an Anwendungsfällen muss jedes Bauvorhaben individuell betrachtet werden.
Folgende Richtlinien dienen als Leitfaden für die Planung:
- Die zulässige Druckspannung des Dämmstoffs bei 10 % Stauchung sollte mindestens 180 kPa betragen. Die Herstellerangaben, welche bei der Anwendung des Dämmstoffs auf Dachterrassen auch auf die hier relevanten Normen Bezug nehmen sollten (DIN 4108-10, DIN EN 13162 - DIN EN 13171, DIN EN 826), sind unbedingt zu beachten.
- Eine erhöhte Anzahl von Stellfüßen reduziert die Punktbelastung auf den Dämmstoff, ebenso die Verwendung von überstehenden Lastverteilungsplatten unter den Stellfüßen (z.B. Betonplatten, Keramikfliesen).
Um Ihre individuelle Bauweise vorab abzusichern ist jedem Fall fachliche Beratung für den Dämmstoff-Untergrund sehr empfehlenswert.

