- Easy DIY assembly thanks to the tool-free Click&Fix system – no drilling or screws required
- Height-adjustable pedestals for perfect alignment and subsequent adjustment using the TRIAS KEY
- Lightweight and sturdy – ideal for balconies, roof terraces and delicate surfaces
- Compatible with many types of surfacing, such as ceramic tiles, stone slabs, natural stone or artificial grass
- Customisable using the TRIAS decking configurator – including material calculations and visualisation
“Build a patio yourself? Is that even possible?” Too complicated, too technical, too time-consuming – that’s how it seems at first glance. But with the right system, a complex construction project becomes a genuine DIY experience, and your dream DIY patio will soon take shape.
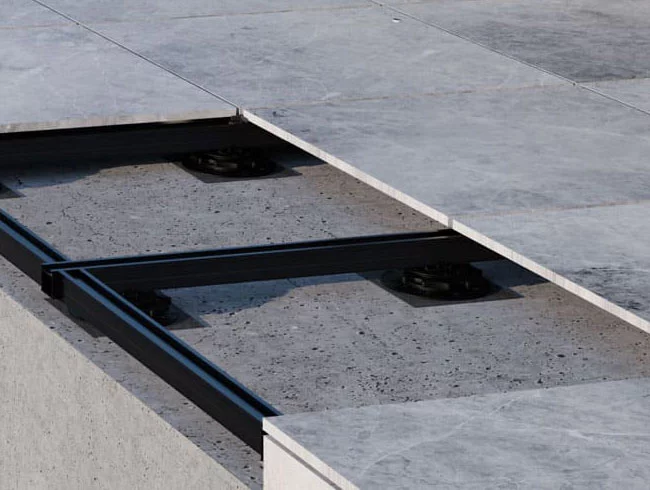
TRIAS WABIC 2.0 is an innovative substructure that is ideally suited to simple, safe and successful DIY installation. No drilling, no concrete work, no frustration – just an intelligent modular system that guides you through every step.
Well-designed components, tool-free click-fit support plates and height-adjustable pedestal supports ensure that everything fits perfectly – without the need for specialist knowledge. DIY enthusiasts in particular, who might be put off by a traditional aluminium substructure, will find TRIAS WABIC 2.0 to be the ideal solution: significantly sturdier than a simple pedestal-supported installation, yet much easier to handle than complex aluminium rail systems.
TRIAS WABIC 2.0 proves that you don’t need to be a professional tradesman to build your own outdoor oasis. “Build a patio yourself? It’s possible!”
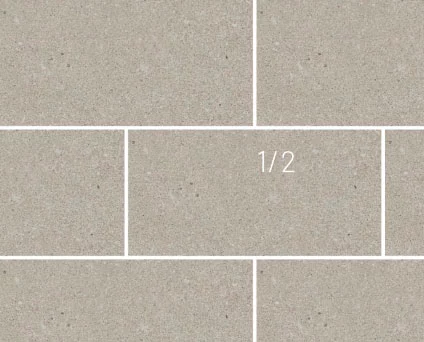
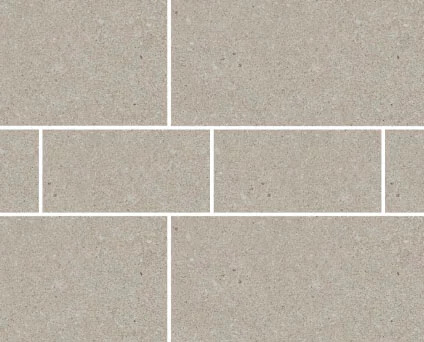
The precisely coordinated system components create a stable, perfectly level surface – ideal for the flexible installation of a wide variety of tile formats and creative laying patterns, such as the popular Roman bond. Mixed tile sizes are also possible, allowing you to combine them however you like. Even large-format slabs can be laid effortlessly, supported by integrated fall-through protection for maximum safety.
Whether on roof terraces, balconies or for temporary use in outdoor catering – the system delivers wherever load-bearing capacity, precision and design freedom are required.
- Simple installation: Thanks to the Click&Fix system, the WABIC 2.0 boards – in the new square format – can be connected to one another without tools, which makes installation considerably easier.
- Flexible installation: The freely positionable X-Pads allow for various laying patterns, such as the Roman bond or a herringbone pattern, thus offering creative freedom of design.
- Height-adjustable: With the TRIAS HELIX pedestal supports and the TRIAS KEY, differences in height can be easily levelled out even after installation.
- Lightweight and sturdy: The boards are made of glass-fibre-reinforced polypropylene; they are easy to transport yet offer high stability and protection against break-through.
- Compatibility: The system is compatible with various types of surfacing, including stone slabs, ceramic tiles and artificial grass (which can be easily glued down).
The TRIAS WABIC 2.0 system offers a modern and user-friendly solution for building a high-quality decking project yourself. Thanks to its well-thought-out design and ease of use, it is particularly suitable for DIY enthusiasts who want to create a stable and aesthetically pleasing decking project themselves.
Whether to save money by doing the work yourself or to bring your own design ideas to life: with durable materials, flexible construction options and clear assembly instructions, building a patio becomes a successful DIY experience.
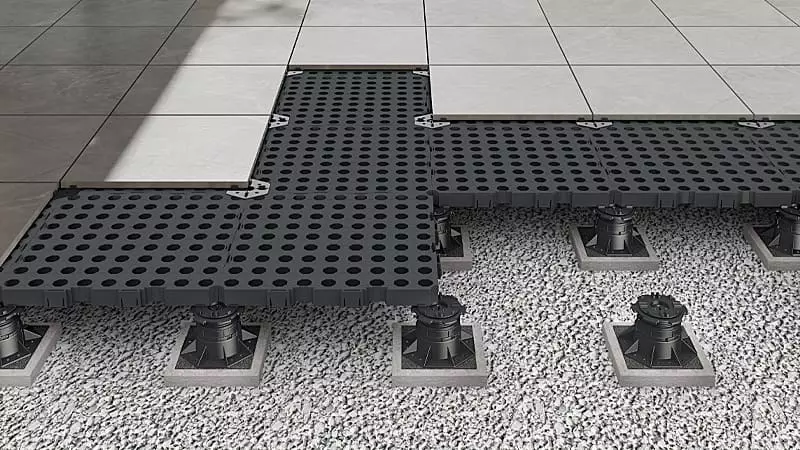
TRIAS WABIC 2.0 is highly versatile – ideal for terraces at ground level, loggias, balconies and roof terraces. A prerequisite for using the height-adjustable pedestals is a stable, load-bearing surface that allows for flexible and secure positioning – such as an existing paving or a solid floor slab.
With the TRIAS Terrace Configurator, you can design your terrace step by step exactly as you wish: personalised, clear and with just a few clicks. Terrace shape and size, decking and suitable substructure, laying pattern and joint width – parameter by parameter, your dream terrace takes shape. This online tool not only helps you with the creative planning, but also takes care of the technical side: the configurator calculates the exact material requirements, provides a clear visualisation and ensures that everything fits together – right down to the last detail.
The first step when working outdoors is to prepare the ground. In the garden, a compacted gravel bed combined with a sturdy weed barrier is usually sufficient. On balconies or roof terraces, you can often install the system directly onto existing concrete surfaces. As a rule, no elaborate foundations are required, as the system is lightweight, sturdy and cleverly designed.
First, lay paving slabs as a base to distribute the load from the pedestal supports evenly. This is particularly important on soft or uneven surfaces such as soil or gravel.
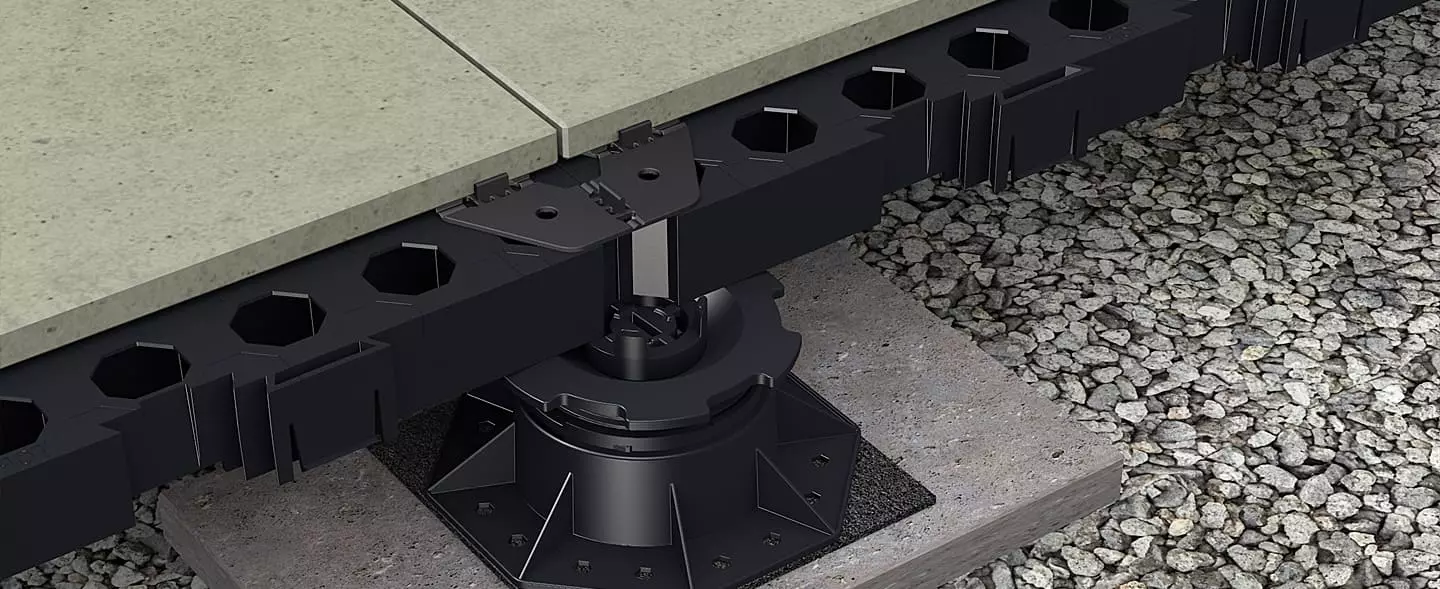
Next, position the height-adjustable TRIAS HELIX pedestals at the designated points, starting at the corners of the first paving slab. If there are adjacent walls, move the pedestals slightly inwards. Ensure there is a gap of around 2 cm between the paving slabs and the wall to allow for sufficient expansion.
Next, insert the add-on adaptors and place the first TRIAS WABIC 2.0 board into the guides. If necessary, add further pedestal supports at central points for extra stability.
With the TRIAS KEY, you can adjust the height of the pedestal supports to the nearest millimetre – even at a later stage, without having to remove the board. This creates a precisely levelled base for your decking, which adapts flexibly to the local conditions and demonstrates, right from the very first step, just how well thought-out the entire system is.
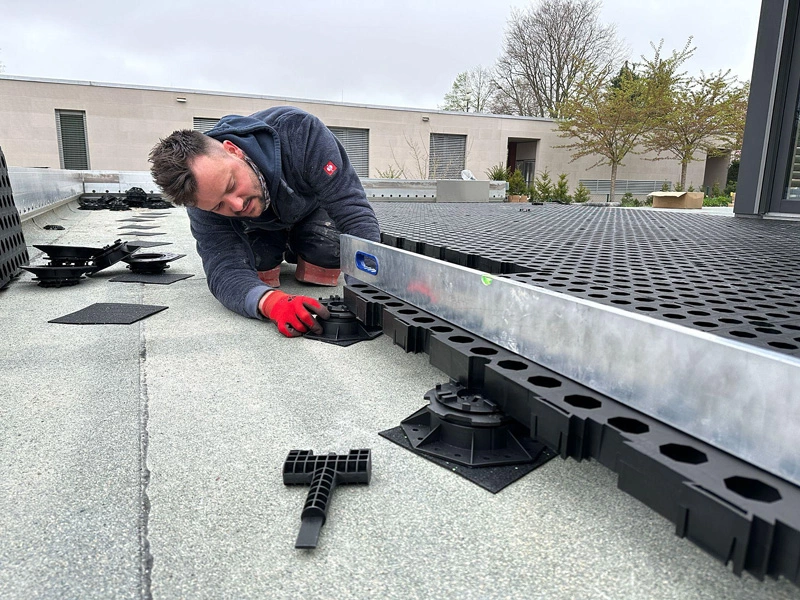
Start in one corner of your prepared area. Now lay the centrepiece of the system – the TRIAS WABIC 2.0 boards – on top of the aligned pedestal supports. These support panels are lightweight yet extremely strong. Thanks to the Click&Fix system, they can be connected to one another easily and without tools. An audible click indicates that they are securely in place.
Work your way forward step by step: position further pedestal supports and lay the next boards. These can rest either directly on the supports or using the adaptors. During installation, always ensure precise alignment and a firm lateral connection – this ensures stability and even load distribution.
Practical tip: Ensure the pedestal supports are correctly levelled whilst laying the boards. Use a long spirit level or straight edge to check the level directly during installation and adjust the height accordingly. This saves time and ensures a particularly neat finish. Should corrections nevertheless be necessary later on: with the TRIAS KEY, the pedestal supports can be adjusted retrospectively from above with millimetre precision, without the need for dismantling.
Your substructure takes shape step by step – precise, stable and ready for the decking of your choice.
Now comes the best part of your project: laying the surfacing. Whether you opt for elegant ceramic tiles, a natural stone look or modern artificial grass – the TRIAS WABIC 2.0 system is suitable for a wide variety of surfacing types and offers maximum design freedom.
The installation is best carried out by two people, and we recommend using several suction lifters as handy aids to ensure that even heavy or large slabs can be positioned securely.
Before laying the tiles, the TRIAS support pads are positioned according to the specified laying grid, as per the instructions. This creates numerous, optimally distributed support points. This not only ensures complete and stable support but also guarantees that the tiles remain permanently slip-resistant.
For even joint spacing and additional stability, simply place the TRIAS WABIC X-pads at the slab joints. They also provide a slight cushioning effect and support a permanently stable support structure. Should additional support be required at individual points, further pedestal supports can be easily fitted at a later stage. To do this, briefly lift the relevant board, insert an additional support, place the board back down and, if necessary, adjust the height using the TRIAS KEY.
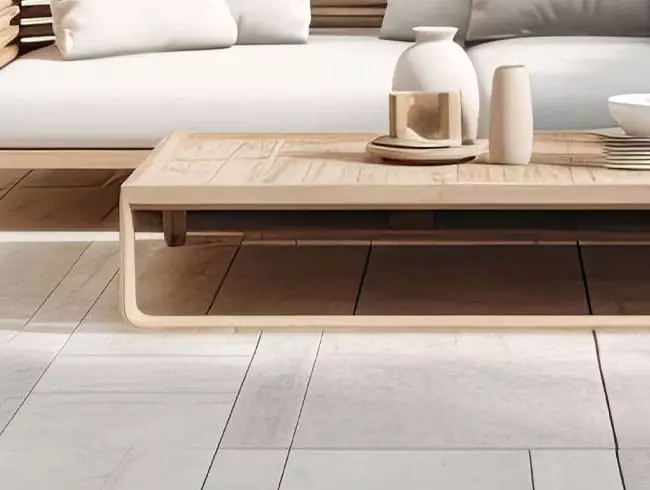
The result is a level, secure and visually appealing surface that you will enjoy for many years to come.
The dimensions of the TRIAS WABIC 2.0 board are independent of the dimensions of the panels to be laid. This essentially allows for a wide variety of laying patterns to be realised.



Finally, turn your attention to the outer edges of your decking to ensure safety, stability and a neat finish. Secure the edge boards using installation adhesive and/or the TRIAS Solid (Steel) edge strip. This prevents the boards from slipping sideways and ensures a permanently secure edge finish. The WABIC 2.0 boards can be cut to size precisely to achieve a neat finish even at the edges.
Depending on the installation, it may be advisable to use additional pedestal supports at the edges, for example if existing supports have been moved inwards or if greater stability is required for custom-cut pieces.
If you’re looking for a particularly harmonious finish, you can further edge the perimeter with the TRIAS Edge edging solution, plants or edging profiles – for a perfectly cohesive overall look.
And there it is: your very own decking. It’s sturdy, level and stylish – and built by you. A DIY project that not only looks great but can also be enjoyed to the full.
With every slab you lay, with every click that clicks into place, it’s not just your patio that grows – but also your pride in what you’ve achieved yourself. Here are a few more tips to ensure everything turns out perfectly:
- Ensure a proper slope: A slope of 2 to 3 per cent away from the building ensures effective drainage and prevents waterlogging.
- Choosing slabs: Use frost-resistant slabs suitable for outdoor use to ensure durability. The slip resistance rating is also important, so that you can walk on your patio safely even when it’s wet.
- Safety considerations: The integrated break-through protection in WABIC 2.0 boards minimises the risk of slab breakage and enhances safety. This is particularly important when using natural stone paving.
- Electricity and water connections: Plan early on where sockets, lighting or water connections are required. Lay the relevant cables safely and securely before the WABIC boards are installed.
TRIAS WABIC 2.0 offers the ideal solution for anyone wishing to create patio areas safely, flexibly and efficiently – whether for private projects or professional use.
TRIAS WABIC 2.0 has been developed for maximum installation efficiency. Thanks to the side-mounted Click&Fix system, the boards can be joined together quickly, without tools and with precision. This not only ensures a stable and well-designed structure, but also makes installation particularly convenient. With the TRIAS KEY, joints can be effortlessly loosened and differences in height corrected even after installation – without having to lift the laid elements. The reduced need for support pedestals also saves on materials and time.
Advantages of the Click&Fix principle:
- Sturdy connection through lateral locking
- No sagging thanks to the load-bearing grid structure
- Clean, level surface with no trip hazards
- Readjustment possible at any time using the TRIAS KEY
Weighing just approx. 2.65 kg per board (60 × 60 cm), TRIAS WABIC 2.0 stands out for its lightness – ideal for hard-to-reach areas or delicate subfloors. Tool-free installation using the Click&Fix system and the new grid dimensions ensure particularly quick and straightforward laying.
Should any custom adjustments be necessary – for example, to accommodate guttering or edge areas – the boards can be cut to size with precision.
Another advantage: the reduced need for support pedestals not only cuts down on installation effort but also reduces the overall weight of the structure. This makes TRIAS WABIC 2.0 the ideal solution for structurally demanding applications such as existing balconies, lightweight roofs or temporary areas in the catering industry.
The dream of having your own terrace no longer has to be a complicated building project. With TRIAS WABIC 2.0, building it yourself becomes an easily planned, safe and achievable DIY project. This well-designed system combines clever technology with ease of use and requires no special tools or prior DIY experience. Whether on a balcony, on the roof or in the garden: you’ll benefit from flexibility, stability and a result that not only looks great but also lasts a long time.